This DIY is for all you handy-women and Janes-of-all-trades. Well.. even if you aren’t one of these, you’re still fully capable of creating this DIY (and there is no shame is asking a man for assistance with the electric power tools. I did! No shame!). Today I’m sharing my most popular post from my personal travel blog about life in Puerto Rico [which you can
read here]. This raised garden bed is perfect for the casual herb & vegetable grower – it’s just enough space for the essentials and very low maintenance. If you want to try your hand at some basic homesteading, start here! The price is right and the rewards are marvelous. Okay, let me show you how:
Turn this empty box into…

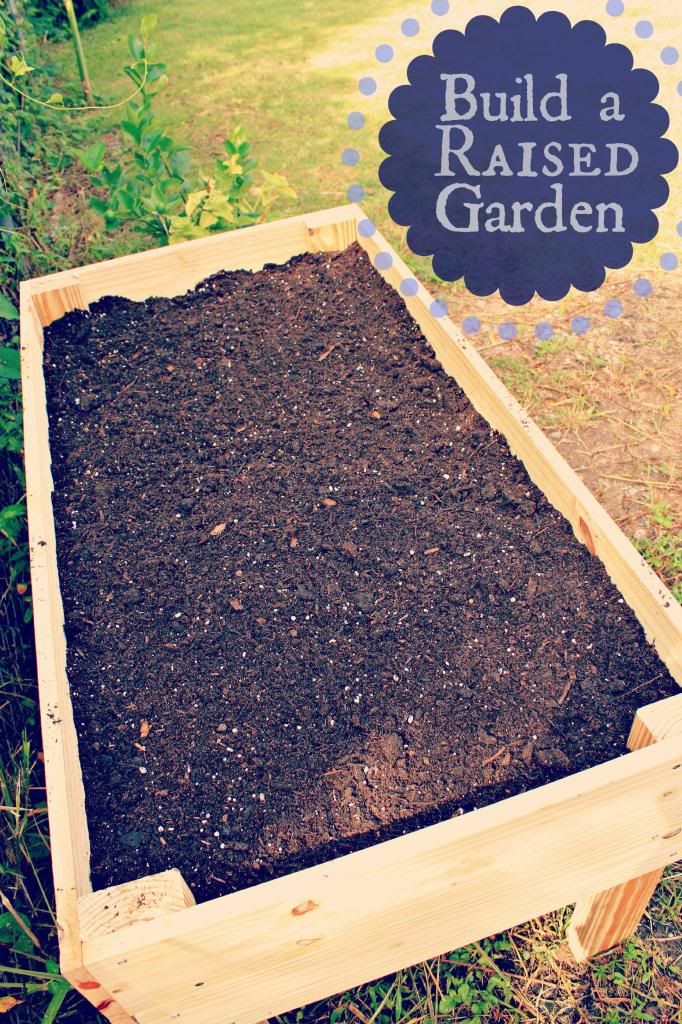
This beautiful planter of herbs and veggies!
 Prepping your Design:
 I would suggest checking out a few designs online to see what style you like best. We decided to go with one that was actually raised 1 foot from the ground because our yard floods in the rainy season (Caribbean islanders, carefully plan your location to avoid the rainy season floods!). So based on the finished product you see above, the materials and required steps are outlined below.
Materials: (all things you can find at your
ferreteria or Home Depot/Lowes)
Three (3) pieces of 1” x 6” x 8′ untreated pine
Three (3) pieces of 2” x 4” x 8′ untreated pine
A box of 1”& 3/4” wood screws
A roll (
~10 feet, you won’t need all this but I think that’s the smallest size) of
small mesh screenA small (
~10 feet) roll of small mesh (1/4” gauge) metal fencing (
like this one, but NOT galvanized)
An electric drill with accessories (drill bits)
An
electric circular saw (or
miter box or
miter saw)
Tape measure
Pencil and Ruler
Box cutter & wire cutter
Staple Gun
Enough potting soil and gardening mix for about 8 cubic feet of space, although we filled ours with only 5 cubic feet.
The total cost of the wood and mesh was around $50 and soil was $40. You can purchase a smaller version of this raised garden bed at Home Depot for around $80 and then add the soil for the additional $40. DIY = better deal and a fun project!! The whole assembly should take only about 2 hours or a little more.
Now I know it probably sounds challenging because it requires some hardware that the average woman may not know how to use confidently. If you are at all uncomfortable with handling electric tools, ask a manly neighbor or friend to do the cutting for you. The last thing you want is a finger in your garden bed, right? Here we go!
Cutting the Wood:
Take your tape measure and pencil and get to work measuring! You will need:
Outside Frame:
*Four (4) two foot posts from your 2”x4”x8′ wood (the legs of the bed; stands one foot off the ground, another foot in the bed)
* Four (4) four foot sections from the 1”x6”x8′ wood and two (2) two foot sections (this forms the sides of the box)
Hint: Start here and build this section first, then come back and measure and cut the other needed pieces below
Inside Structural Support:
Cut the 2”x4”x8′ sections into two (2) pieces that are ~43 1/2 inch long (this forms the inside edge of which you will secure the mesh)
Cut the remaining 2”x4”x8′ section into three (3) pieces that are ~17 inches long (this forms the cross section in the middle and sides that meet the other inside pieces; mesh will cover these pieces)
 Assemble the Pieces: a second person to assist here is ideal!
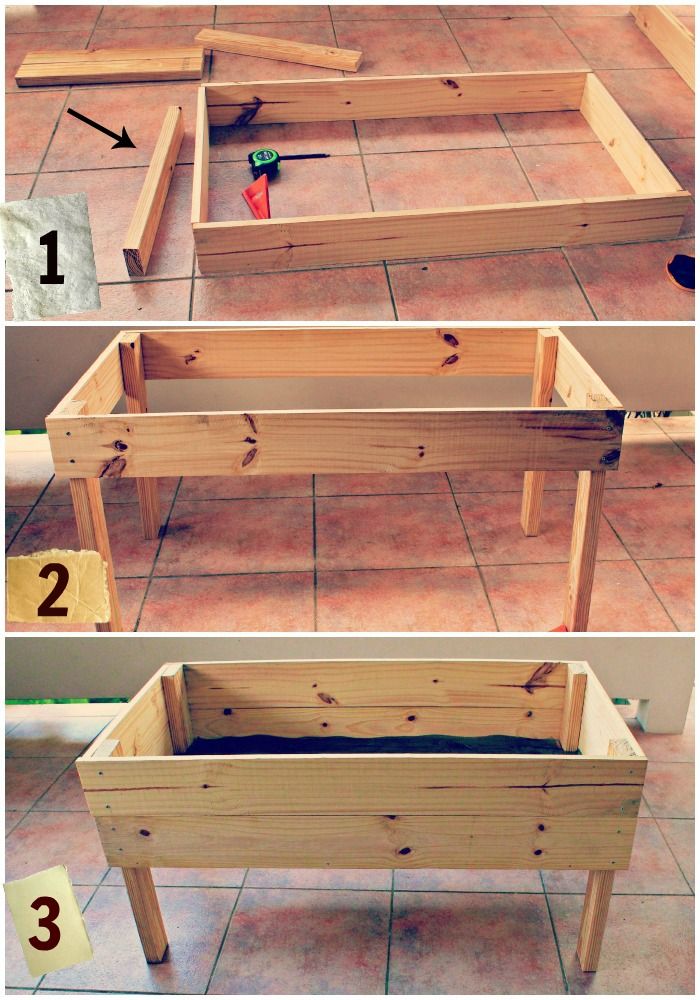
1. Start by lying out your outer frame (as shown in step 1 above). Leave the legs to the side. Make sure all the pieces are the appropriate lengths.
2. Take your first leg and stand it up in one of the inside corners with the short end facing the longest piece of the frame. Make sure that your frame remains stationary. The leg should be flush against both sides of the inside of the outer frame and be snugly in the corner. Have a friend hold this leg in place while you do the next steps.
3.Take your electric drill with a 3/32 bit and drill two holes through the long side of the frame and into the leg. See Step 2 photo for the general location of the holes. Screw two screws into those holes. Move around to the short end of the frame that is touching the first leg. Repeat the drilling and screwing. You now have your first leg attached!
4. Repeat this process for the other corners. When finished, stand it up and make sure it’s level. It should look just like Step 2 in the photo above.
Whew that’s the hard part! Now on to the easier parts!
5. Drill and screw the remaining outer frame support so that it resembles the Step 3 photo (minus the screen inlay).
6. Measure the inside of the frame (it should be around 43 1/2 inches long and about 17 inches wide). Measure the width across the middle too, just to be safe. Go cut the remaining pieces as indicated in Cutting the Wood.

Notice the interior support. Yours should look like this. Now you are ready to install the mesh and wire screen to hold all your soil and vegetables!
Screen Inlay:
1. Roll out the soft mesh screen and cover the top of the box. Cut the mesh straight across even with the box but leave a about 2 inches of extra just in case. For us, the screen was actually almost the same width as the box.
2. Hold the mesh secure over the top of the box and use a box cutter to cut around the legs. Allow the mesh to sink into the box. Trim the mesh around the sides so that it leaves a small overlap up the sides and the edge doesn’t sit directly onto the internal support. This allows for a little extra breathing room as the mesh will eventually sag under the weight of the soil. Notice we didn’t do that. Hindsight =20/20
3. Take the mesh out. Roll out your wire screen and place the mesh on top. Use this as a stencil to trace the exact size you need for the wire mesh. Cut with wire cutters.
4. Place the wire mesh inside the frame first, then overlay it with the screen mesh. Trim where necessary. Use a staple gun to secure both pieces onto the interior framing as shown above. Don’t have a staple gun? We used small nails that we hammered less than halfway into the wood and then bent over to secure the meshes. Just make sure it is taunt across the wood, no sagging!
Congrats!! You’re done!! Now find a place with lots of sunlight and access to rain or your water hose. Move this frame before filling it in – much easier to move this way!
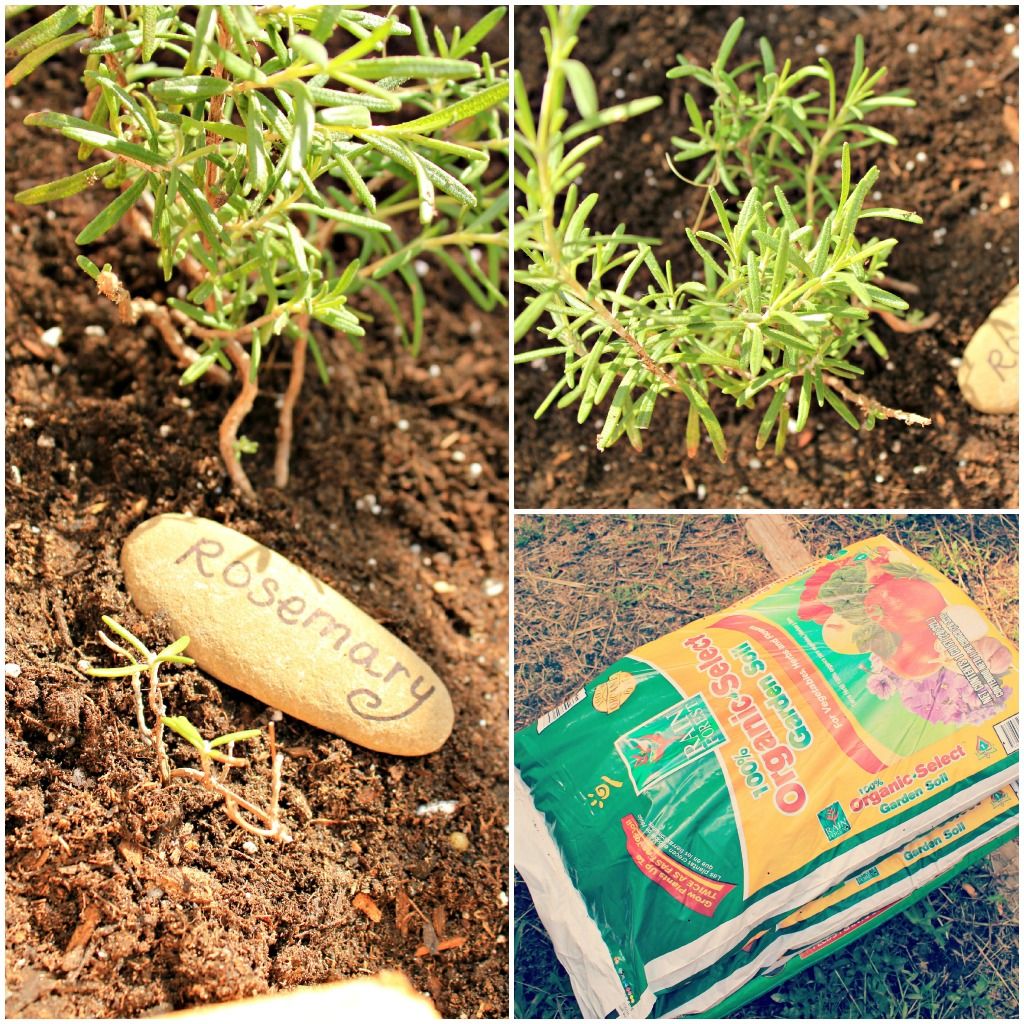
1. Rosemary // 2. Jalapeno // 3. Dill // 4. Basil // 5. Thyme // 6. Culantro // 7. Spearmint // 8. Mexican Oregano // 9. Ginger Root
and not visible in the photo: 10. Red Bell Pepper
Well, I hope you’ve enjoyed this week of DIY projects. Now you have a TON of things to try and experiment with. I’d love to hear how any of them turn out for you, so please feel free to email me or leave a comment under the post and let me know if you have questions, what you tried and if you liked it! I still have several more DIYs to feature in the upcoming month, so stay tuned! Some of these include: homemade liquid hand soap, mermaid canvas art – not much drawing skill required, uses for coconut oil, recycled wine cork bulletin board and some others!
Next week is starting off strong with a wonderful giveaway!! Hurray! So come back on Monday for more fun! Have a beautiful and safe weekend (and to all my Caribbean friends, a dry weekend from Hurricane Sandy!).
Like this:
Like Loading...
Related


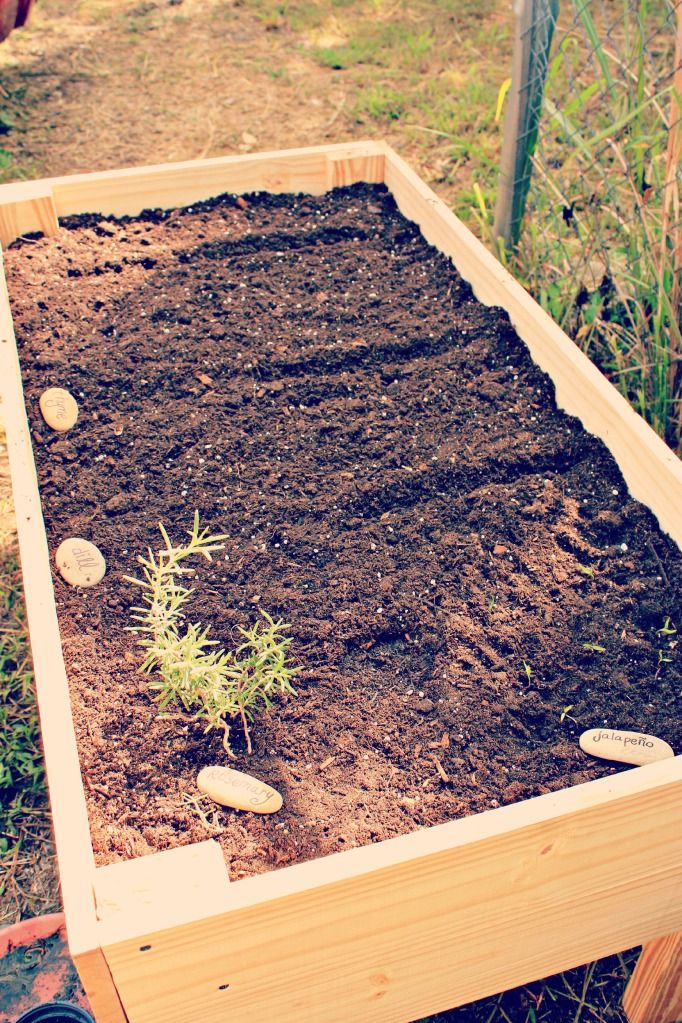
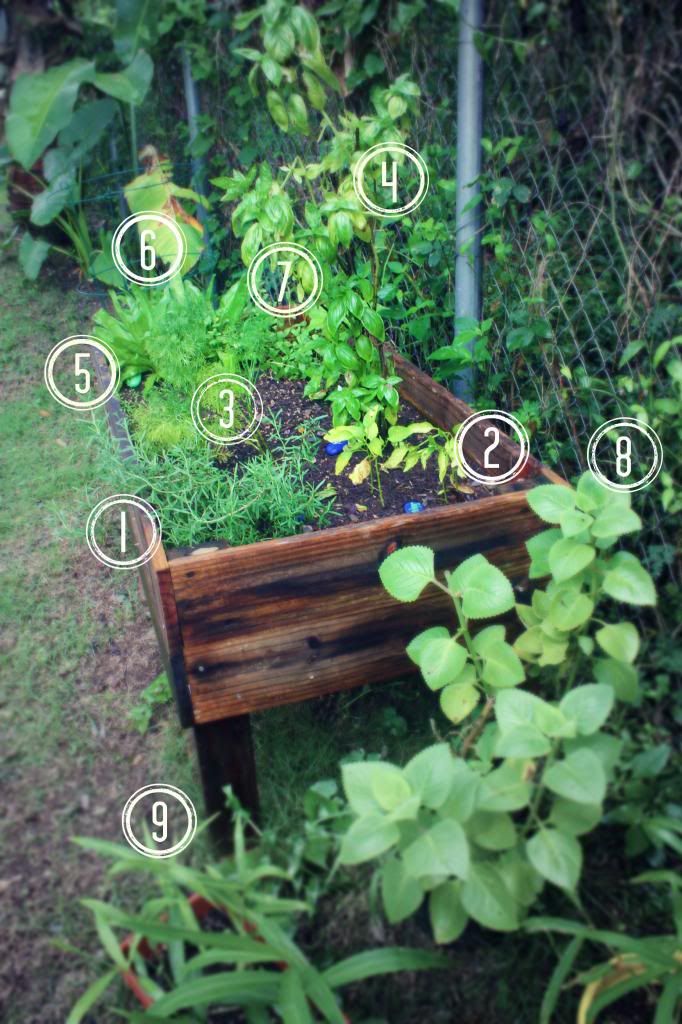 We’ve harvested many herbs from this raised bed, in only a matter of 5 months. Wanna know what we planted? Here is everything, according to the number ID above:

Keeping this on file for when we have yard space!
LikeLike